Thorp Air Command - T18.net

Supporting Owners, Builders and Pilots of the Thorp T-18 and its variants.
It is currently Sat May 11, 2024 12:31 pm

All times are UTC - 6 hours [ DST ]


Post new topic Reply to topic  [ 248 posts ]  Go to page Previous  1, 2, 3, 4, 5, 6 ... 17  Next
Author Message
Pacer 20
 Post subject: Re: C-FPVE
PostPosted: Wed Feb 20, 2013 9:38 pm 
Sr. Member
Sr. Member

Joined: Sat Feb 09, 2013 11:34 am
Posts: 233
Location: Montreal, Canada
Wednesday report!
Inside doubler finally prime. It's time to make some riveting noise.
Image

Happy with the result. Door need final adjustment only when I install the locking mechanism.
Image

I patch this hole at my coffe break tomorrow.
Image

Hole festival.... In February!
Image

My work for the next month. I prefer my T-18. I'm not able to put 23 us/gal of 100LL in economic cruise.
Image

Image

Cheers!

_________________
Thierry
French Canadian T-18
C-FPVE #091


Top
 Profile  
 
Pacer 20
 Post subject: Re: C-FPVE
PostPosted: Fri Feb 22, 2013 3:25 pm 
Sr. Member
Sr. Member

Joined: Sat Feb 09, 2013 11:34 am
Posts: 233
Location: Montreal, Canada
Coffe break time.
I start to made some design to patch my bottom skin. Some cu-out with inside doubler and a flush patch. I dont like this idea. No-body see the bottom of this plane but I decide to remove the entire skin. Quick check and I have a brand new aluminium sheet in my stock room. So.....licence to dril >:D

Image

Image

Image

Image

Image

Operation time 2 and a half hours. Ok plus my beer time!
Now I have to found somebody to help me to install rivets :) :) :)

_________________
Thierry
French Canadian T-18
C-FPVE #091


Top
 Profile  
 
Rich Brazell
 Post subject: Re: C-FPVE
PostPosted: Fri Feb 22, 2013 3:56 pm 
Hero Member
Hero Member

Joined: Wed Oct 21, 2009 12:33 pm
Posts: 3095
Images: 64
Location: Jamul, CA (San Diego area)
Nice job ! This is where I found Cherry Max rivets to be my best friend ! No help to buck and I can't reach it by myself . BOOM !

RB O0


Top
 Profile Personal album  
 
Pacer 20
 Post subject: Re: C-FPVE
PostPosted: Fri Feb 22, 2013 4:15 pm 
Sr. Member
Sr. Member

Joined: Sat Feb 09, 2013 11:34 am
Posts: 233
Location: Montreal, Canada
Thanks :) :) :) MrBrazell!
Cherrymax and PRC was a great combo but the price was expensive when you have to install a complete skin. Otherwise if I find a friend to help, I have to calculate: the beer, pizza lunch, cofee, doghnuts and all the rest. Finally the same price of a bag of Cherrymax!!! And a couple of week later the same friend call you to help for some backyard job at his house :-\

What is the best way....

_________________
Thierry
French Canadian T-18
C-FPVE #091


Top
 Profile  
 
Rich Brazell
 Post subject: Re: C-FPVE
PostPosted: Fri Feb 22, 2013 5:22 pm 
Hero Member
Hero Member

Joined: Wed Oct 21, 2009 12:33 pm
Posts: 3095
Images: 64
Location: Jamul, CA (San Diego area)
Go to E-Bay . There use to be a guy from Canada that was selling Cherry Max rivets in 1000 piece lots . 10 bags at the time and he was getting $100.00 + shipping ($10.00 a bag) . I bought 2 orders from him and still have most of the second order to use for "repairs." You could even specify the length . Last time I looked he was up to $120.00 per lot + shipping . Shipping from Canada to California was expensive , but even with the shipping is was one hell of a deal compared to Spruce where it was around $50-60 per 100 of 4-2 flush CM rivets . Not sure if the guy is still listing on E-Bay ?

RB O0


Top
 Profile Personal album  
 
Rich Brazell
 Post subject: Re: C-FPVE
PostPosted: Fri Feb 22, 2013 8:30 pm 
Hero Member
Hero Member

Joined: Wed Oct 21, 2009 12:33 pm
Posts: 3095
Images: 64
Location: Jamul, CA (San Diego area)
I checked E-Bay and the guy from Canada is still selling the Cherry Max rivets...1000 piece lots . He lists the lots in a group of different sizes , but I asked him to send me all one size and he did . The all important 4-2 . Price has gone up , but I think it is still a very good deal compared to any vendor in the US . :P You guys in Canada he might be living right next door ? :o

RB O0


Top
 Profile Personal album  
 
Pacer 20
 Post subject: Re: C-FPVE
PostPosted: Mon Feb 25, 2013 11:23 pm 
Sr. Member
Sr. Member

Joined: Sat Feb 09, 2013 11:34 am
Posts: 233
Location: Montreal, Canada
Bonjour!

Last week of work before my kids winter vacation. I closed the shop Friday and I coming back March 11, so I rush to finish all the metal in the tail fuselage section for the end of this week. I want to install the stabilisator to see if my hole was parallel to both support. I rebuilt all the tail section via the plan but I want to be shure before it was too late. I dont want to put all 5/32 rivet everywhere to mask my mistake.

Tail wheel support are all in place.

Image

A real cleco plantation.

Image

First inspection at the vertical fin. Another major repair! Not repair I have to built a brand new fin.

Image

I need more vocabulary for this job :-\ :-\

Image

Please give me more english expression. In french I have lot of good words but if I talk in french nobody understand on this forum. ^-^

Cheers!

_________________
Thierry
French Canadian T-18
C-FPVE #091


Top
 Profile  
 
fytrplt
 Post subject: Re: C-FPVE
PostPosted: Tue Feb 26, 2013 6:23 am 
Hero Member
Hero Member
User avatar

Joined: Tue Oct 20, 2009 8:07 pm
Posts: 1140
Images: 2
Location: Lakeland, Florida, USA
Thierry,

It would be better if you make the steel angle for the rear tail spring support wider the join the bottom longerons as well. We have experienced cracking of this piece if built to plans.

Too bad about the fin. A new one is in order. If your vacation includes Florida, look us up.

_________________
Bob Highley
N711SH
SN 835
KLAL


Top
 Profile Personal album  
 
Pacer 20
 Post subject: Re: C-FPVE
PostPosted: Tue Feb 26, 2013 10:23 am 
Sr. Member
Sr. Member

Joined: Sat Feb 09, 2013 11:34 am
Posts: 233
Location: Montreal, Canada
Fytrplt.

Do you have some dimension about the new part? Is it for both steel plate or just the rear one. Same thickness
or not ?

Thanks.

_________________
Thierry
French Canadian T-18
C-FPVE #091


Top
 Profile  
 
Fraser MacPhee
 Post subject: Re: C-FPVE
PostPosted: Tue Feb 26, 2013 2:24 pm 
Sr. Member
Sr. Member

Joined: Wed Oct 21, 2009 8:57 am
Posts: 722
Images: 19
Location: USA
Thierry - below are a few photos of what I ran into - and how I repaired it - note the repair spans the bottom longerons - what is not shown is two 1/4 inch bolts per each side. I used the existing rivet holes - drilled them out and put the bolts through the repair piece locking everything together - there is also a spacer between the new piece and the skin (between the longerons) - I cannot remember the thickness of the repair piece at the moment, but the whole repair may at least give you some guidance as to how to make that area stronger.

It's been almost two years and is working well.

PS.....J'ai reste a Ville de Quebec puis Montreal (Brossard) pour plus de 6 mois - je comprend "colon" francais pa mal....:)...though it has been quite awhile since I spoke it.


Attachments:
Tailwheel fix.jpg
Tailwheel fix.jpg [ 347.1 KiB | Viewed 13447 times ]
Fatigue.JPG
Fatigue.JPG [ 2.36 MiB | Viewed 13447 times ]
Broken Flange from rear.JPG
Broken Flange from rear.JPG [ 2.57 MiB | Viewed 13447 times ]
Top
 Profile Personal album  
 
fytrplt
 Post subject: Re: C-FPVE
PostPosted: Tue Feb 26, 2013 8:23 pm 
Hero Member
Hero Member
User avatar

Joined: Tue Oct 20, 2009 8:07 pm
Posts: 1140
Images: 2
Location: Lakeland, Florida, USA
Thierry,

Just the rear one needs to go the full length as it takes up the side loads from the tail spring. Mine is the same width as the original part, but extended to pick up the bottom longerons. I don't recall the tickness, but I think it was as called out in the plans. As stated by Monsieur Fraser, you may need a spacer to level up the angle across the bottom skin and the longerons.

_________________
Bob Highley
N711SH
SN 835
KLAL


Top
 Profile Personal album  
 
Pacer 20
 Post subject: Re: C-FPVE
PostPosted: Tue Feb 26, 2013 10:06 pm 
Sr. Member
Sr. Member

Joined: Sat Feb 09, 2013 11:34 am
Posts: 233
Location: Montreal, Canada
Stabilisator in place, fit was perfect! Last hole punch and ready for the next step.

Image

Quick view about the torque tube...Hum I have to check the plan to see this miss match between bolt and rivet! Sounds no good for me...

Image

Lot of chaffing on this area.

Image

Inside of the torque tube. Some rivet are very to much crush but...... I have to check with the SDR Horizontal tail Spar Doubler to be shure is in place.

Image

All skin removed and tomorrow is the priming day. I have to made a new 4130 stel plate for my tail wheel attach. Thanks for the picture Fraser MacPhee and for the doubler info fytrplt. I appreciate.

Image

_________________
Thierry
French Canadian T-18
C-FPVE #091


Top
 Profile  
 
Rich Brazell
 Post subject: Re: C-FPVE
PostPosted: Tue Feb 26, 2013 11:18 pm 
Hero Member
Hero Member

Joined: Wed Oct 21, 2009 12:33 pm
Posts: 3095
Images: 64
Location: Jamul, CA (San Diego area)
I have serious doubts about the spar tube/fittings ! C:-) 
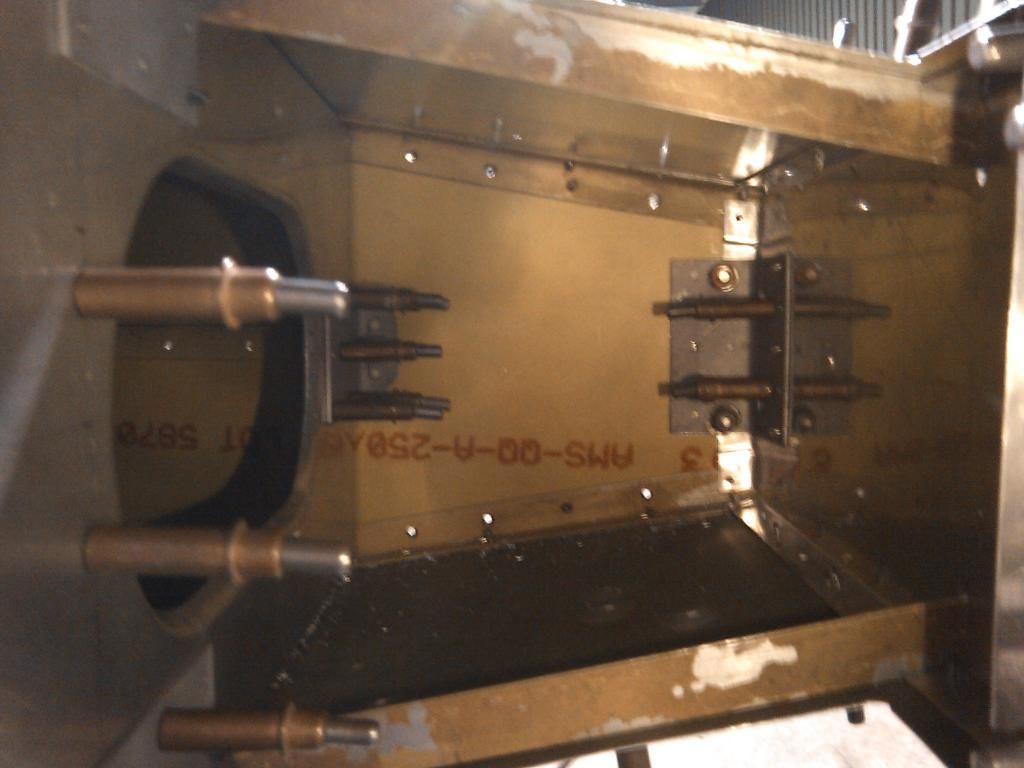
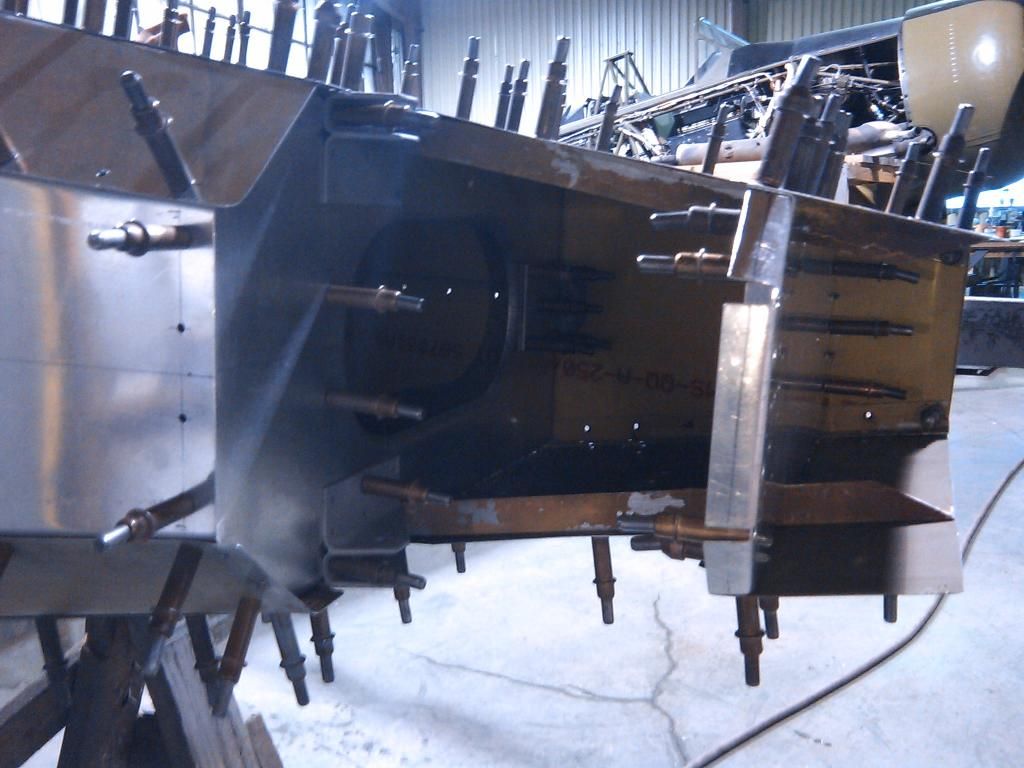
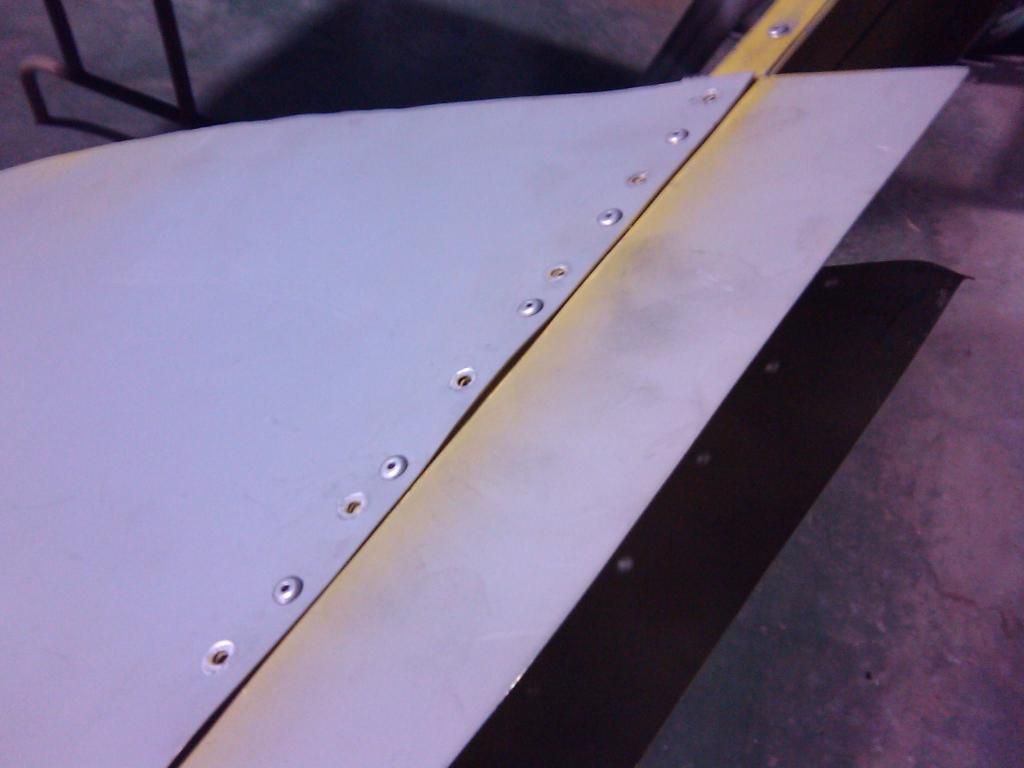
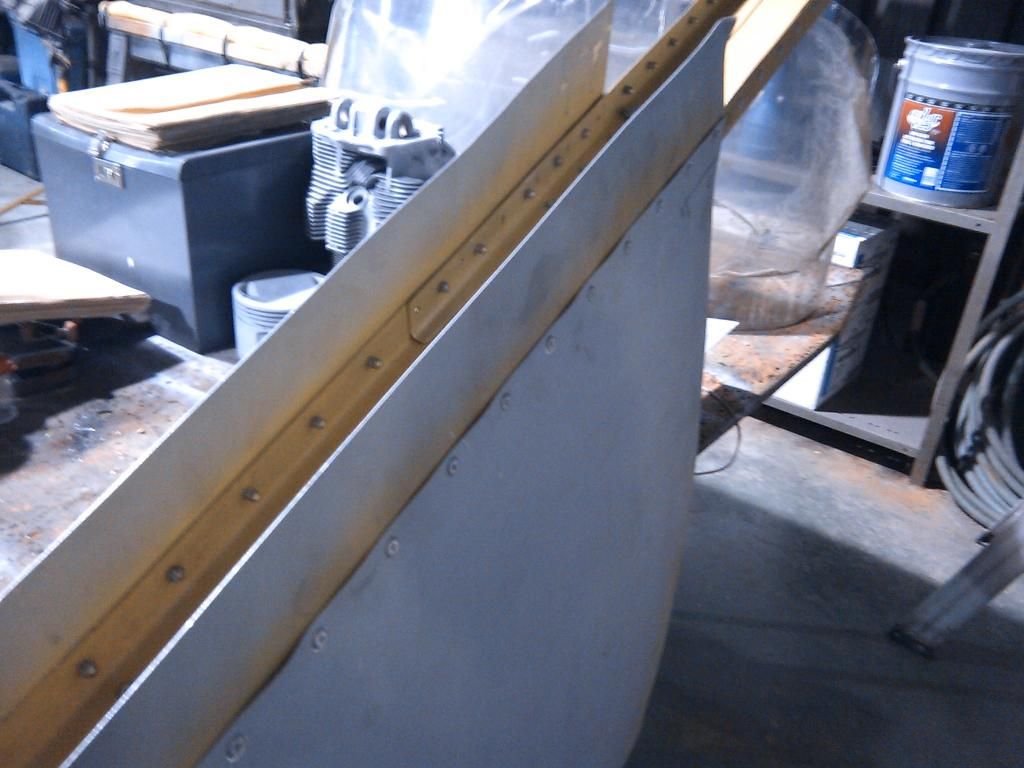
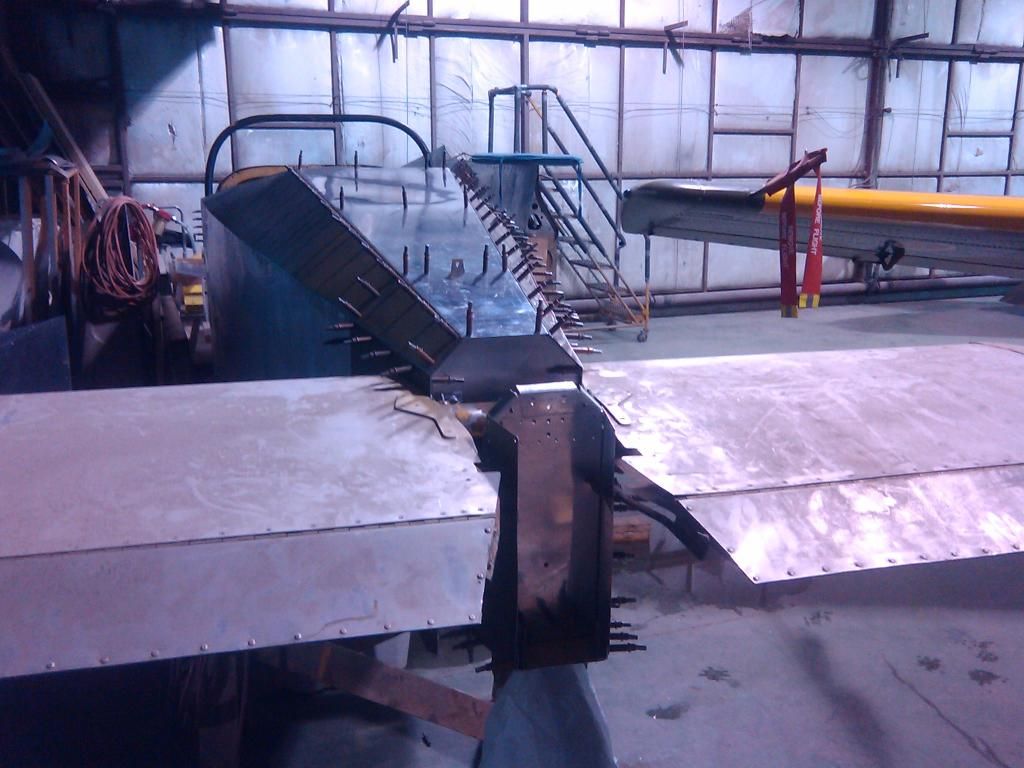
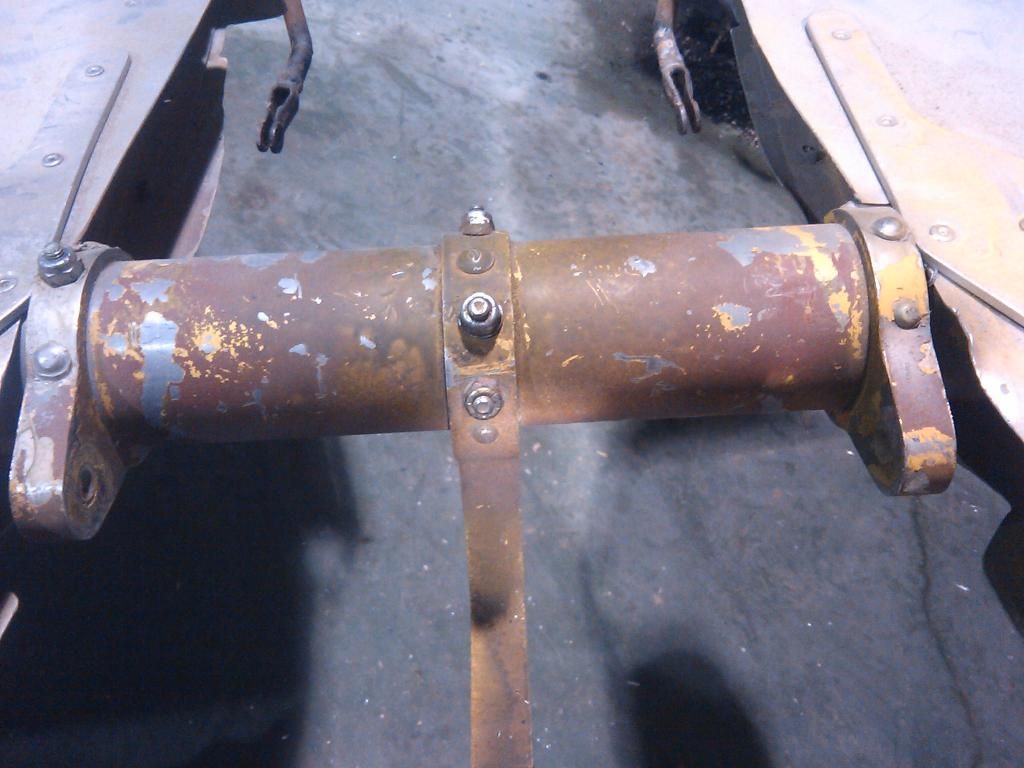
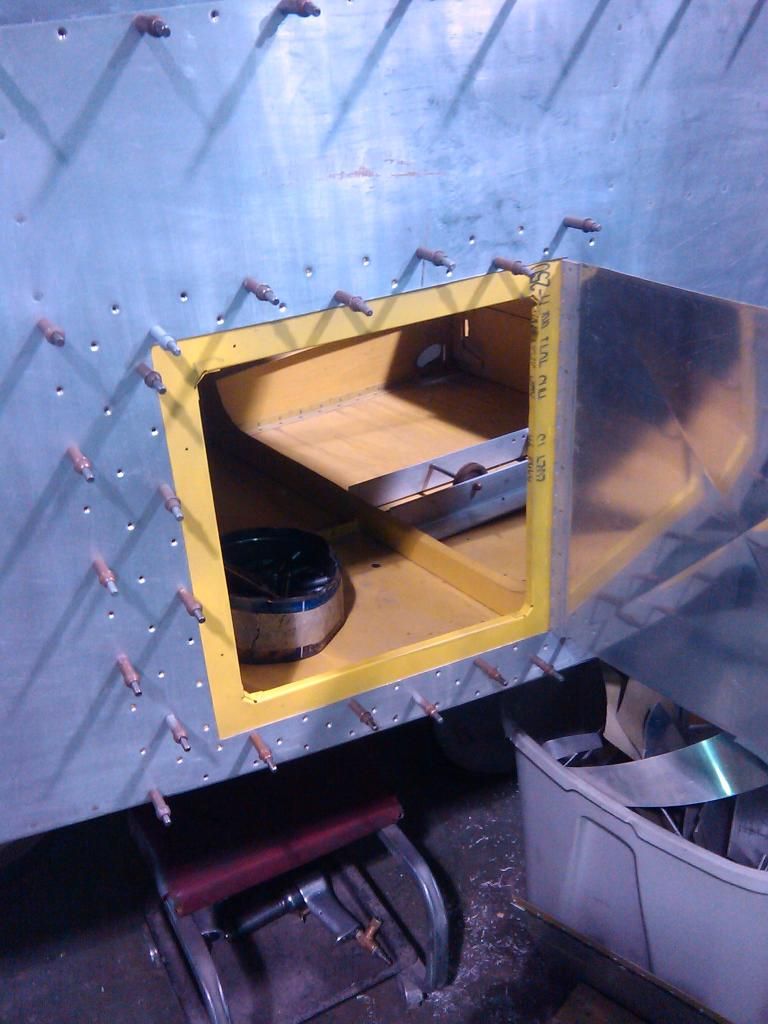
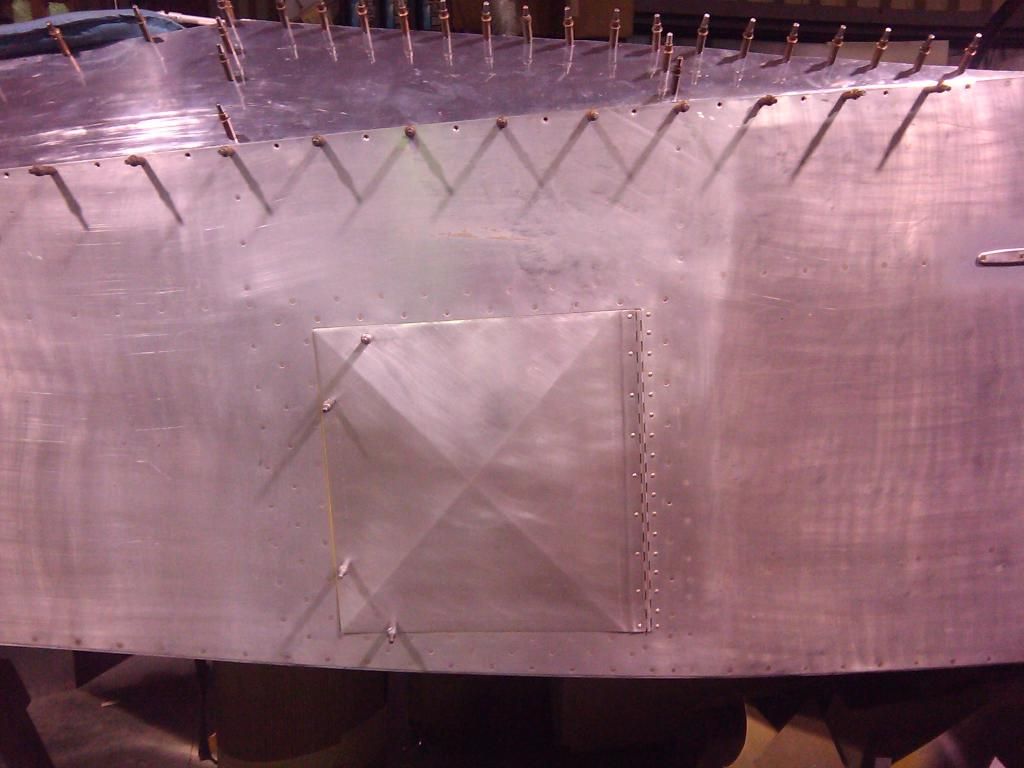
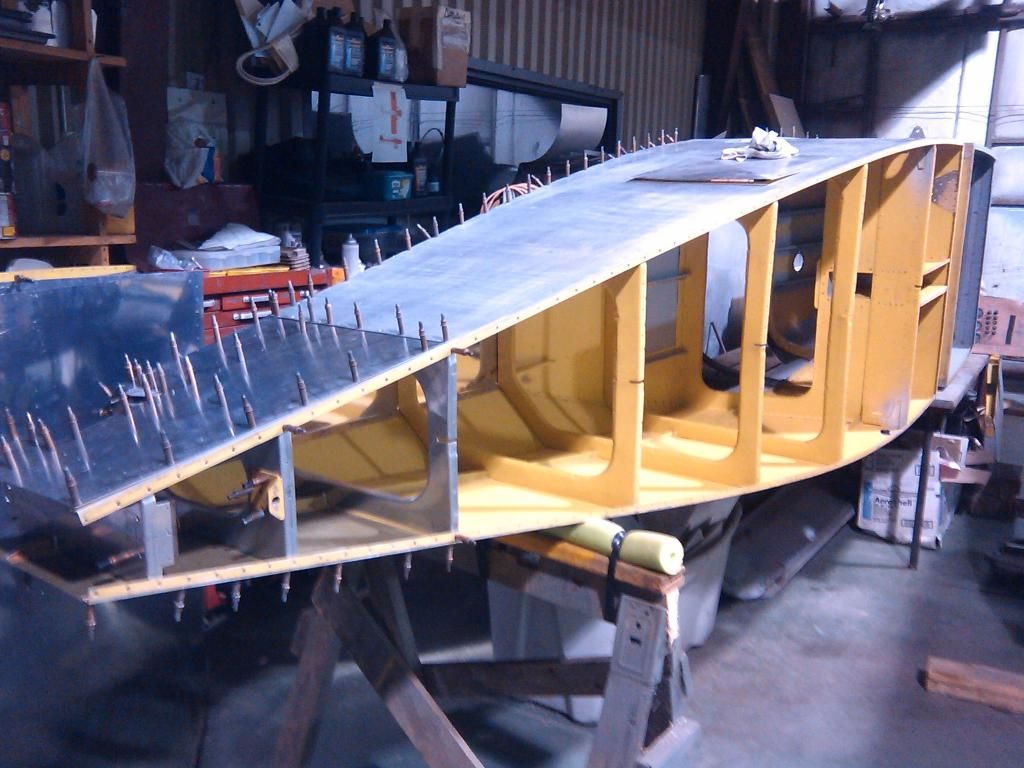
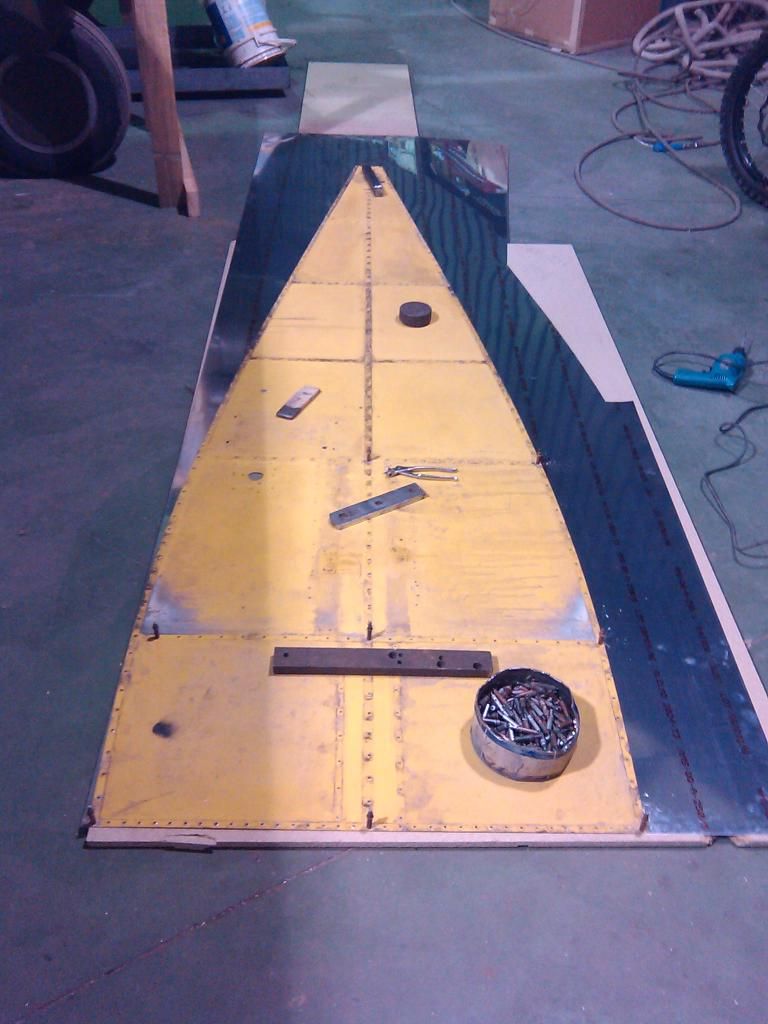
My first clue is the use of bolts in place of the required rivets . :'( 
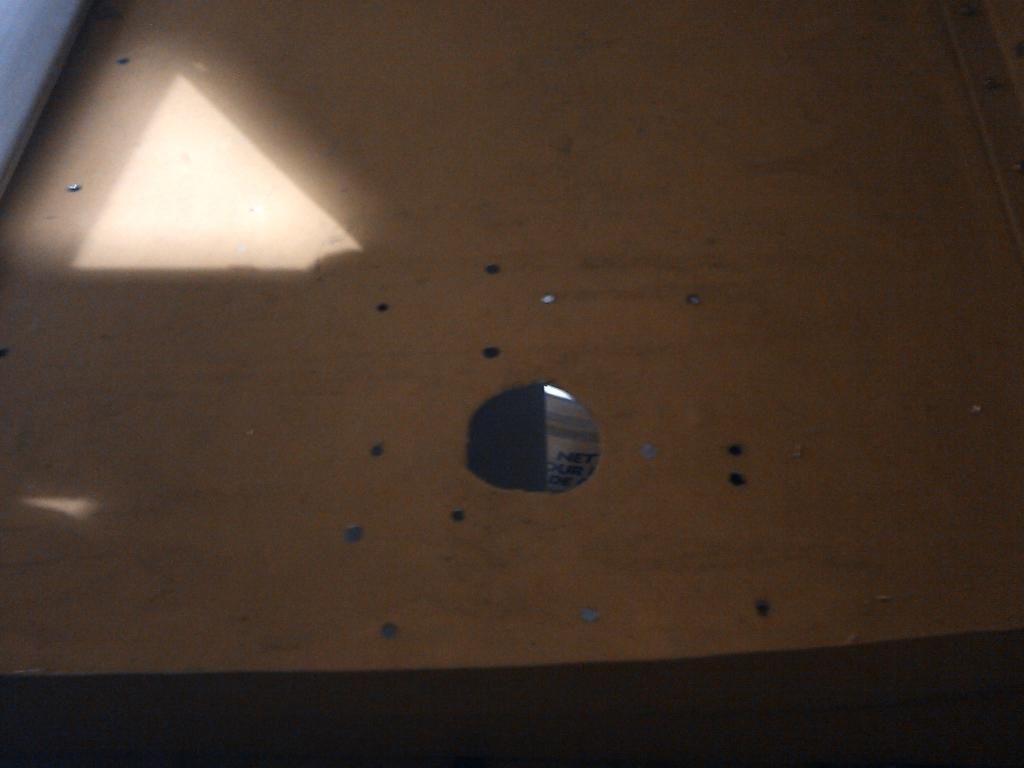
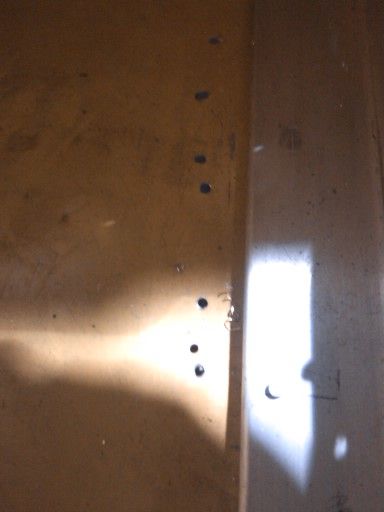
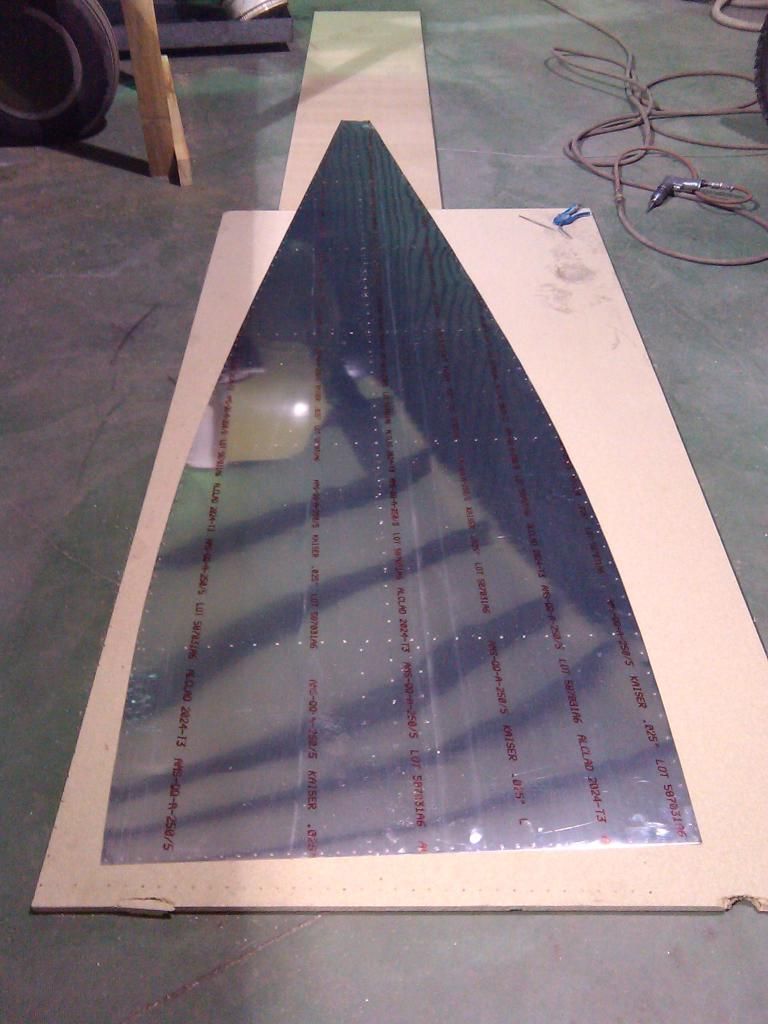
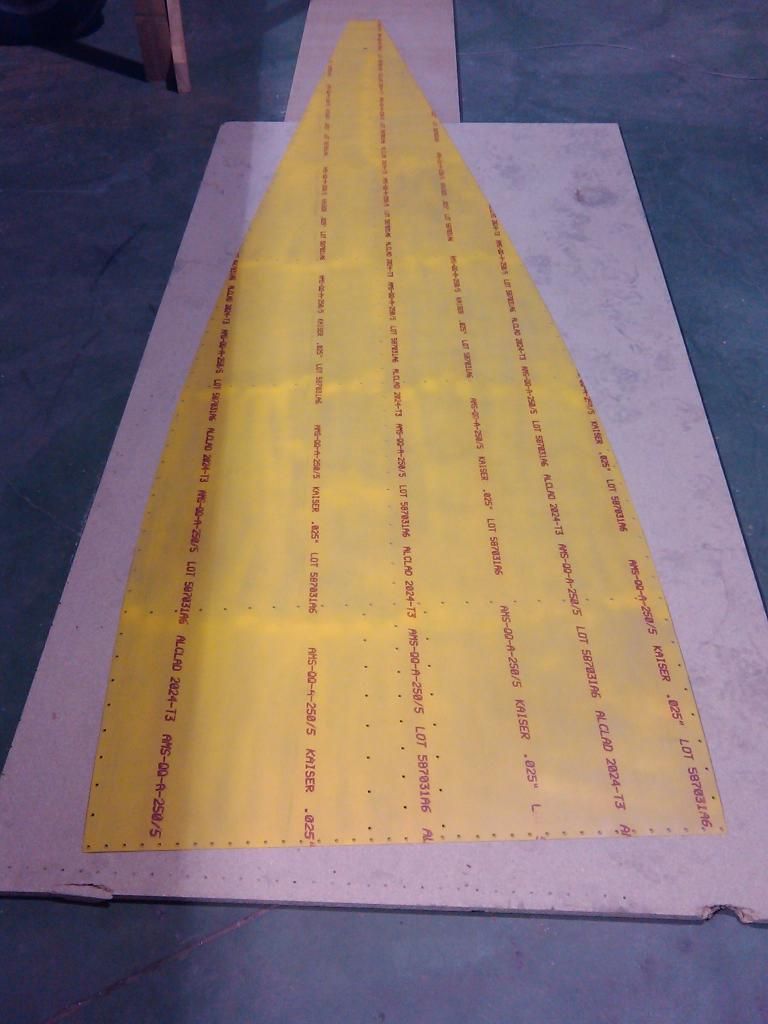
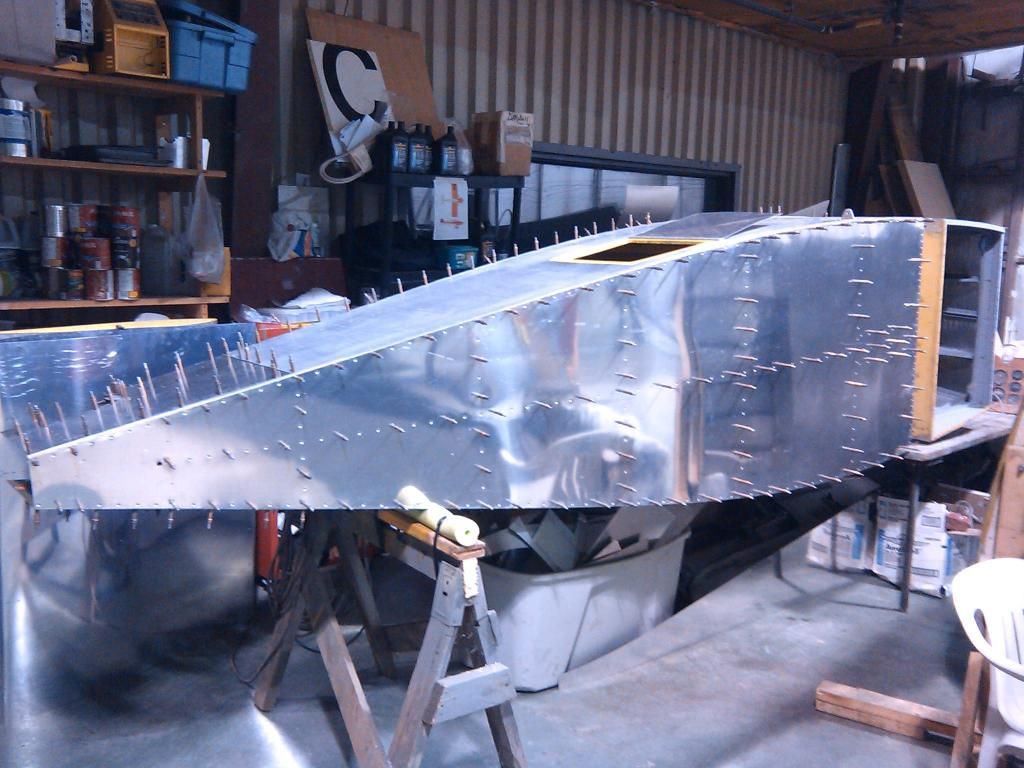
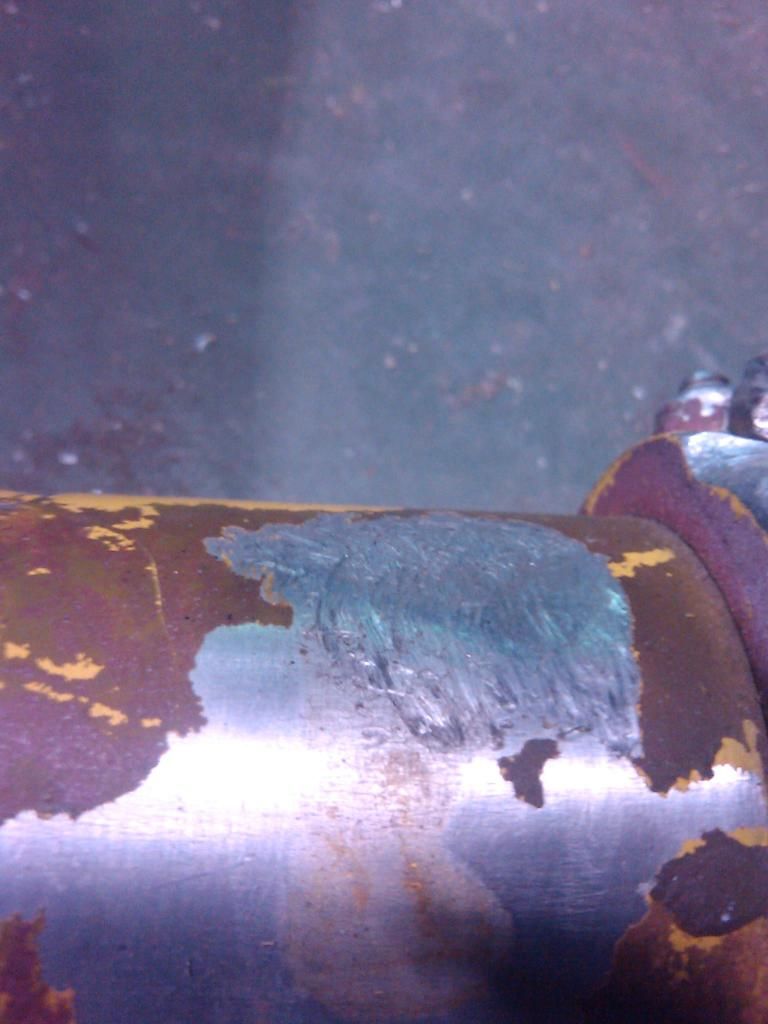
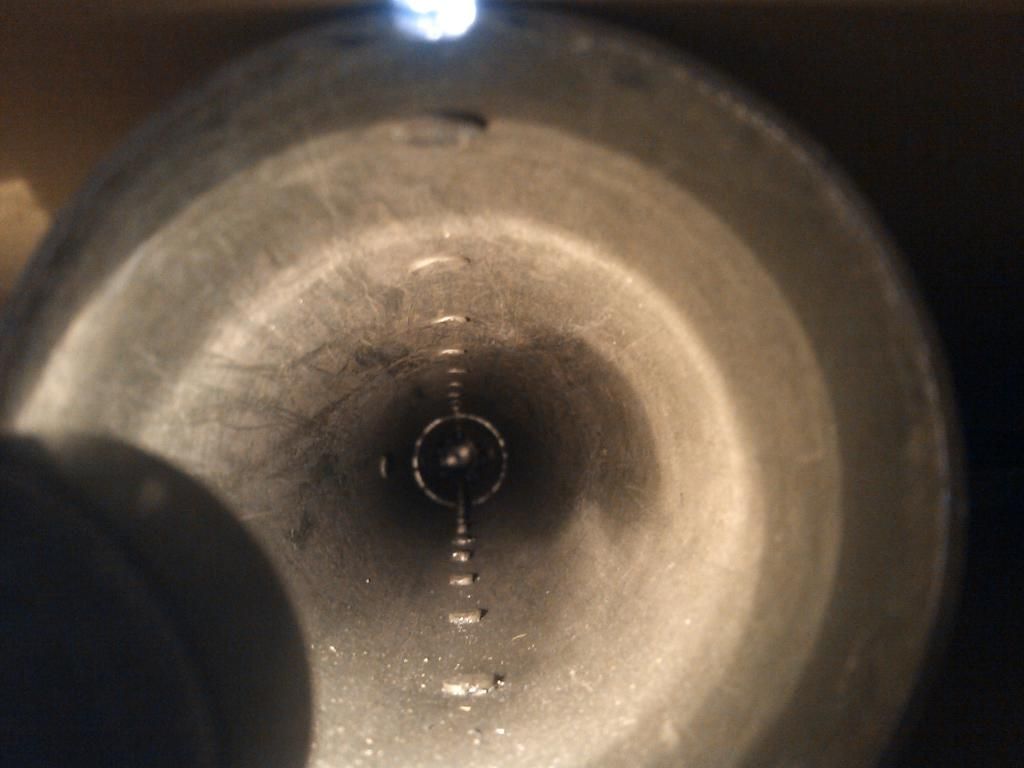
This would increase the the hole size in the spar tube/fittings . The use of the bolts is probably because of the poor riveting job job on the spar tube (inside and out) as shown by the photo . I also see "pop rivets" that were used to attach the doublers on the top of the stab skin . I would have serious doubts if they are structural "pop rivets." They are not CM rivets . The chaffing is probably due to not enough of a cut out on the fus. skin or on the top access panels that cover the fin area . From your pic of the inside of the tube you should be able to see the spar tube doubler ? ;)

IMHO I would drill out the skins and redo the spar tube and fittings and make sure the spar tube doubler is installed . It would also be a good time to see if the SS stiffiners were installed on the tabs . At the speed you are working and the quality of your work from the photos , redoing the stab would be a piece of cake ! ;) The over "bucked rivets" as shown inside the spar tube may be due to incorrect length ? ???

RB O0


Last edited by Rich Brazell on Tue Feb 26, 2013 11:29 pm, edited 1 time in total.

Top
 Profile Personal album  
 
Rich Brazell
 Post subject: Re: C-FPVE
PostPosted: Tue Feb 26, 2013 11:22 pm 
Hero Member
Hero Member

Joined: Wed Oct 21, 2009 12:33 pm
Posts: 3095
Images: 64
Location: Jamul, CA (San Diego area)
OK Fraser I guess I need to take another H.S. language class ! "UN , DEUX , TRUIS , QUATRE !" "Oh La' La' , "Mon Dieu' " :o

RB O0


Top
 Profile Personal album  
 
fytrplt
 Post subject: Re: C-FPVE
PostPosted: Wed Feb 27, 2013 6:55 am 
Hero Member
Hero Member
User avatar

Joined: Tue Oct 20, 2009 8:07 pm
Posts: 1140
Images: 2
Location: Lakeland, Florida, USA
Be very wary of that spar! Those look like soft skin rivets and the deviations at the fittings could mean they were installed wrong and refit. One of the fittings at least, needs to be removed and the spar underneath inspected.

_________________
Bob Highley
N711SH
SN 835
KLAL


Top
 Profile Personal album  
 
Display posts from previous:  Sort by  
Post new topic Reply to topic  [ 248 posts ]  Go to page Previous  1, 2, 3, 4, 5, 6 ... 17  Next

All times are UTC - 6 hours [ DST ]


Who is online

Users browsing this forum: No registered users and 5 guests


You cannot post new topics in this forum
You cannot reply to topics in this forum
You cannot edit your posts in this forum
You cannot delete your posts in this forum
You cannot post attachments in this forum

Search for:
Jump to:  

[ Time : 0.160s | 14 Queries | GZIP : On ]